Javascript is not enabled.

Javascript must be enabled to use this site. Please enable Javascript in your browser and try again.

Skip to content
Content starts here
CLOSE ×
Search
CLOSE ×
Search
Leaving AARP.org Website

You are now leaving AARP.org and going to a website that is not operated by AARP. A different privacy policy and terms of service will apply.

6 Fresh and Fruity Summer Potluck Recipes

Professional chefs told AARP their favorite healthy and budget-friendly fruit-based recipes for gathering with friends and family


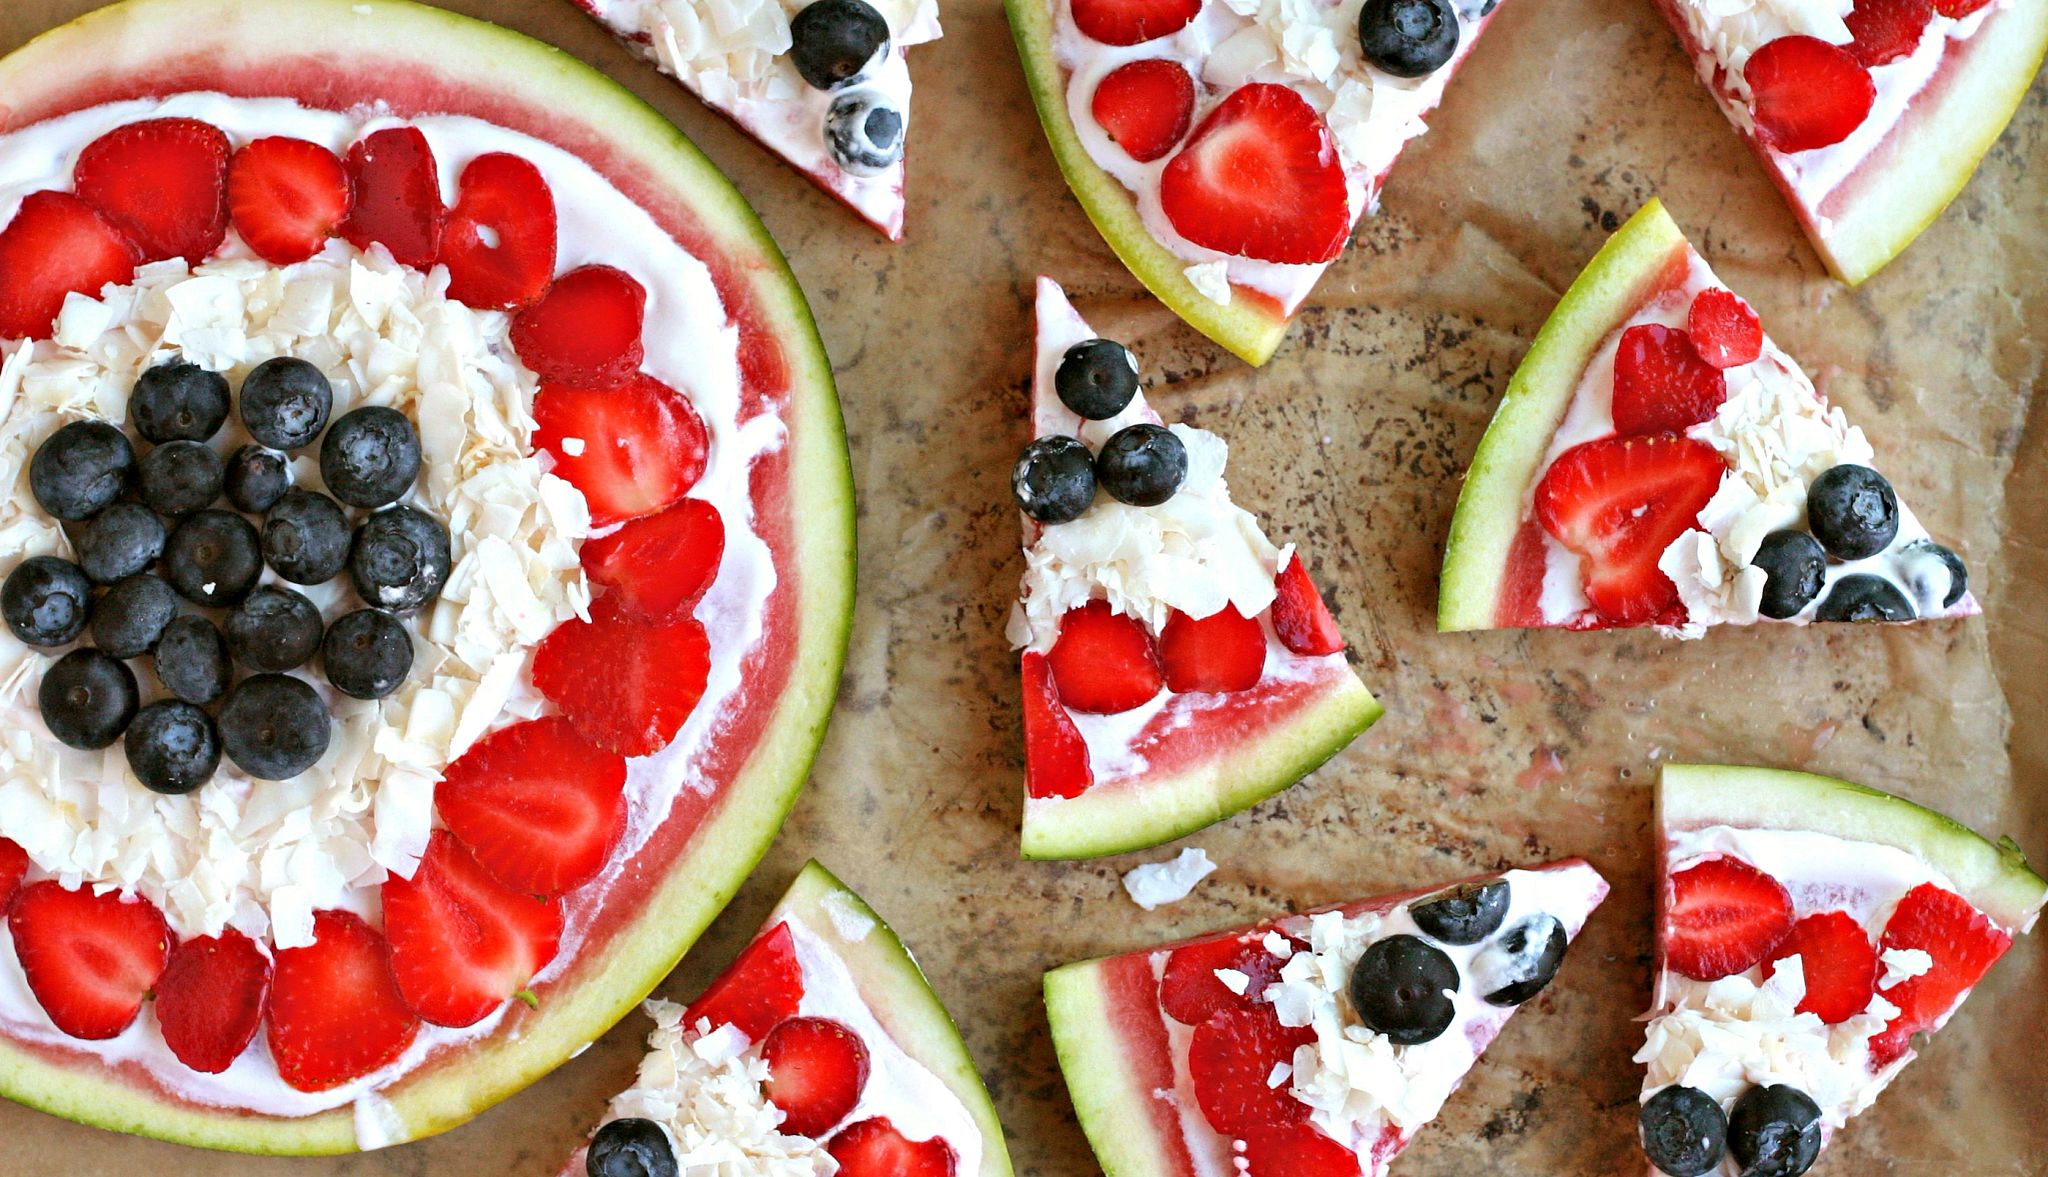
A watermelon pizza is pictured, featuring blueberries, strawberries and nondairy yogurt toppings. The whole pie is on the left, with slices on the right side.
Watermelon Pizza
Courtesy Alyssa Brantley

It’s time to prep for your summer potlucks and picnics. Wondering what to feed your friends and family? Why not celebrate summer with something fruit-based?

It's an especially great idea because older Americans aren't getting enough fruit, according to the National Institute on Aging — and adding more can benefit overall health.

From watermelon pizza to grilled peach sandwiches, professional chefs share six dishes and tell us why they fit the bill for your next gathering.

Watermelon Pizza

By Alyssa Brantley, a cookbook author and creator of the food blog Everyday Maven. Serving size: 15

“This watermelon pizza recipe is easy to make and very portable via a baking sheet,” Brantley says. “Alternatively, you can prep the fruit and bring everything to a party and let kids assemble them as an activity. They love doing this!”

INGREDIENTS

  • Medium- to large-size ripe watermelon, washed and sliced into five 1-inch- thick rounds
  • 1 quart blueberries, washed and dried
  • 1 quart strawberries, washed, dried, hulled and thinly sliced
  • 1 cup unsweetened shredded or flaked coconut
  • 16 ounces plain nondairy yogurt, on the thicker side so it doesn’t run

PRO TIP: Brantley recommends the following methods for picking out a perfectly ripe watermelon: Look for a buttery colored “field spot“ where the watermelon sat on the ground as it grew and ripened. Ripe watermelons have a nice, yellow-colored field spot. Slap the watermelon. Ripe watermelons should make a hollow-ish sound. Smell it. Ripe watermelons don’t create a strong smell when ripe, but they should smell sweet if you sniff where the stem was. 

DIRECTIONS

1. Wash the watermelon before slicing it into five 1-inch-thick rounds.

2. Set the rounds aside on parchment or wax-paper-lined baking sheets without stacking.

3. Wash and dry the blueberries.

4. Wash, dry and remove the stems from the strawberries before thinly slicing them from top to bottom.

5. Spread 2 tablespoons of nondairy yogurt on each round of watermelon.

6. Place the sliced strawberries on each round to create a border ring of red.

7. Create a ring of white on each round with the coconut.

8. Fill in the middle of each round with blueberries.

9. Refrigerate the rounds for 15 to 30 minutes or until the topping has set.

10. Serve your watermelon pizza by slicing each round into 6 slices.

PRO TIP: Brantley recommends keeping the watermelon pizza refrigerated until just before serving, especially if it’s hot outside.

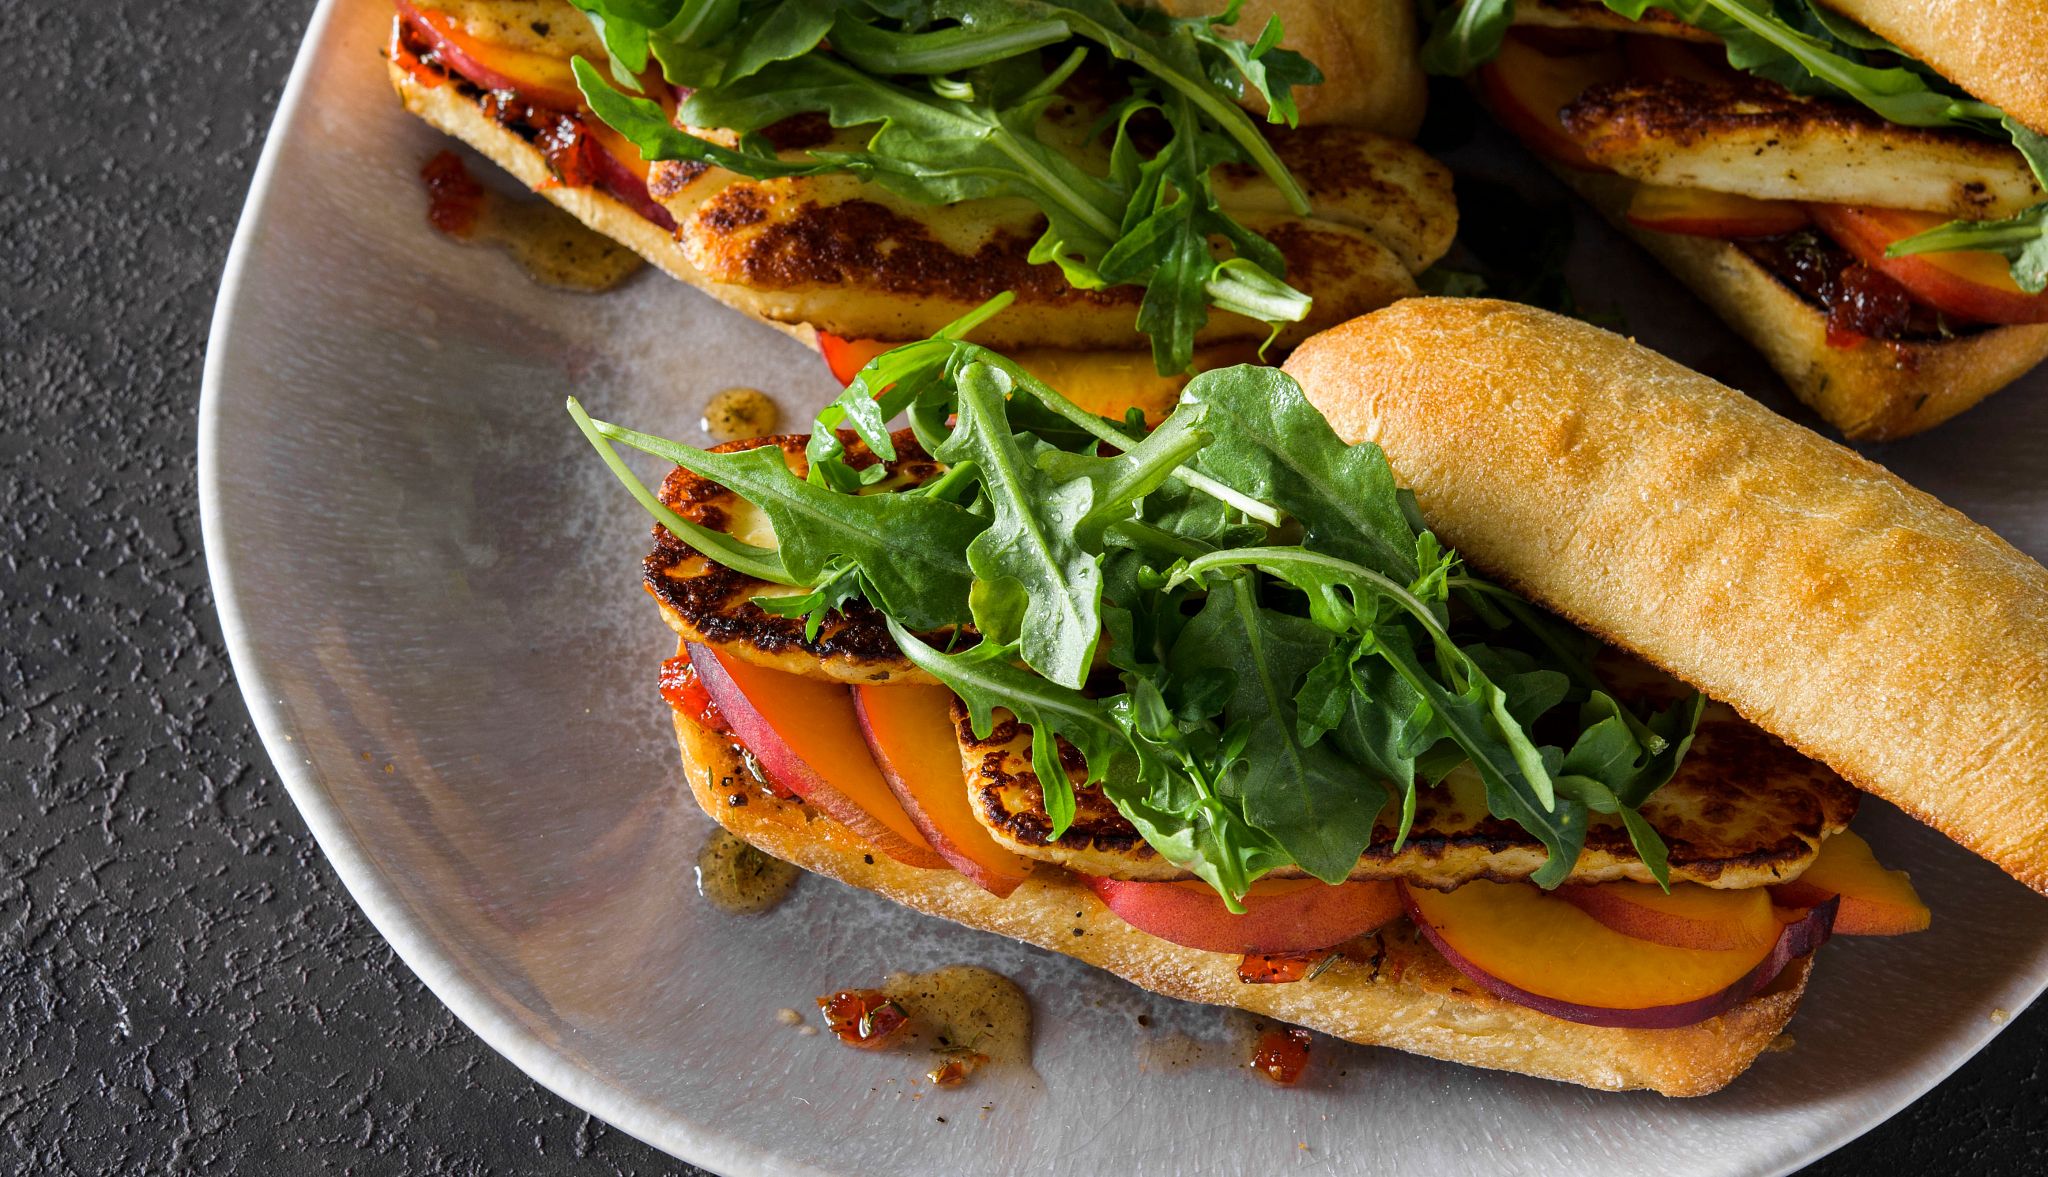
Fried Halloumi Sandwiches With Peaches, Arugula and Honey

A fried halloumi sandwich with peaches, arugula and honey is pictured on a plate atop a countertop.
Fried Halloumi Sandwiches with Peaches, Arugula and Honey
Courtesy Connie Miller

By the recipe developers at Christopher Kimball’s Milk Street, a cooking and multimedia company based in Boston and founded by Kimball, who is an editor, publisher and chef. Serving size: 4

“Firm, salty halloumi cheese, often referred to as the ‘grilling cheese,’ is a great protein choice for this light summer sandwich,” says Wes Martin, the director of culinary production at Christopher Kimball's Milk Street. “We like to sear the cheese in a hot skillet, but you can also grill it until lightly charred if serving it at a cookout.”

For easy portability, Martin says to “wrap these sandwiches tightly in butcher paper.”

INGREDIENTS

  • ⅓ cup honey
  • ⅓ cup drained Peppadew peppers or sweet cherry peppers, patted dry and finely chopped
  • ½ teaspoon dried thyme
  • Ground black pepper
  • 2 ounces baby arugula (about 3 cups lightly packed)
  • 1 tablespoon lemon juice
  • 6 tablespoons extra-virgin olive oil, divided, plus more as needed
  • 4 ciabatta rolls, split
  • Two 8.8-ounce packages halloumi cheese (see pro tip below), sliced ¼ to ½ inch thick and patted dry
  • 2 ripe peaches, pitted and thinly sliced

PRO TIP: Don’t forget to pat the halloumi dry. Removing as much moisture as possible minimizes splatter during frying. Immediately after adding the cheese to the skillet, allow it to cook undisturbed before checking on browning. If moved too soon, the cheese may stick to the pan.

DIRECTIONS

1. Combine the honey, peppers, thyme and ½ teaspoon black pepper in a small microwave-safe bowl before microwaving, uncovered, on high until fragrant and warm (about 1 minute) and set aside.

2. Toss the arugula with the lemon juice in a medium bowl and set aside.

3. Place 2 tablespoons of the oil and half of the rolls, cut side down, in a 12-inch nonstick skillet over medium-high heat.

4. Cook the rolls until golden brown on the bottoms (about 2-4 minutes).

5. Transfer the rolls to a cutting board, toasted sides up, and toast the remaining rolls in the same way with another 2 tablespoons of oil.

6. Use the same skillet over medium-high to heat the last 2 tablespoons of oil until it shimmers.

7. Add the halloumi to the skillet in a single layer and cook, undisturbed, for the first couple of minutes before occasionally flipping each slice until both sides are browned (about 4-6 minutes). Reduce the heat if the cheese is browning too quickly.

8. Remove the skillet from the heat. Brush the toasted sides of the rolls with the infused honey from step 1.

9. Lay the peach slices on the bottom halves of the rolls before topping with the halloumi and arugula.

10. Finish your sandwiches by placing the other halves of the rolls on top. 

Yuzu Kosho Chicken Skewers With Grilled Pineapple

Yuzu kosho chicken skewers with grilled pineapple are pictured. The skewers are garnished with sesame seeds.
Yuzu Kosho Chicken Skewers With Grilled Pineapple
Courtesy Amy Kimoto-Kahn

By Amy Kimoto-Kahn, a fourth-generation Japanese American, personal chef and cookbook author based in Boulder, Colorado, who is behind the Japanese-inspired food blog easypeasyjapanesey. Serving size: 8-10 skewers

“Japanese-inspired dishes that incorporate fruit can be elegant, refreshing and perfect for a warm-weather holiday like Memorial Day or for summertime gatherings and barbecues with friends and family,” Kimoto-Kahn says. “Bold, citrusy and just the right amount of heat, these skewers balance savory grilled chicken with the sweetness of caramelized pineapple — a bright, crowd-pleasing dish perfect for summer grilling.”

INGREDIENTS

  • 1 pound boneless, skinless chicken thighs, cut into bite-sized pieces
  • 2 teaspoons yuzu kosho (Japanese citrus-chili paste)
  • 2 tablespoons soy sauce
  • 1 tablespoon mirin (a Japanese sweet rice wine)
  • 1 tablespoon sake
  • 1 tablespoon neutral oil
  • 1 cup fresh pineapple chunks
  • 8-10 bamboo skewers, soaked in water
  • Red pepper, parsley and toasted sesame seeds to garnish

PRO TIP: You can substitute the yuzu kosho for a simple mixture of citrus and chili paste (1 teaspoon lime or lemon zest + 1 teaspoon lime or lemon juice + ½ teaspoon chili paste)

DIRECTIONS

1. Whisk the yuzu kosho, soy sauce, mirin, sake and oil in a bowl.

2. Toss the chicken in the marinade and refrigerate it for at least 30 minutes.

3. Thread the marinated chicken and pineapple chunks alternately onto skewers.

4. Grill the skewers over medium heat for 8-10 minutes, turning occasionally, until the chicken is charred and cooked through.

5. Garnish the skewers with finely chopped red pepper, parsley and toasted sesame seeds.

6. Serve your skewers at any temperature, though warm is ideal.

PRO TIP: After grilling, slide the chicken and pineapple off the skewers and pack them in a sealed container. Serve chilled or at room temperature with toothpicks or in lettuce cups for easy, mess-free bites.

Chili-Lime Pineapple and Honeydew Salad

A chili-lime pineapple and honeydew salad is pictured in a bowl atop a countertop
Chili-Lime Pineapple and Honeydew Salad
Courtesy Joe Murphy

By the recipe developers at Christopher Kimball’s Milk Street. Serving size: 4-6

“This fragrant, almost savory fruit salad is so much better than just a bowl of halved grapes and blueberries,” says Martin. “We take the bracing combination of chili powder and lime typically sprinkled on mango and melon, a popular Mexican street snack, and add even more textures and flavors with crisp, crunchy jicama and spicy radish slices along with honeydew and pineapple.”

INGREDIENTS

  • 3 cups (about 1 pound) fresh pineapple chunks (¾ to 1-inch pieces)
  • 3 cups (about 12 ounces) honeydew chunks (¾ to 1-inch pieces)
  • 4 small radishes, sliced about ⅛ inch thick
  • 8-ounce chunk jicama (½ medium-size jicama), peeled and cut into 1-inch wedges and sliced crosswise about ⅛-inch thick
  • ½ English cucumber, halved lengthwise, seeded and sliced about ⅛-inch thick
  • 1 teaspoon grated lime zest, plus 2 tablespoons lime juice (more lime juice if needed)
  • 1 tablespoon extra-virgin olive oil
  • Kosher salt
  • ½ teaspoon chili powder, divided
  • ¼ cup lightly packed fresh mint, torn 

DIRECTIONS

1. Toss the pineapple, honeydew, radishes, jicama, cucumber, oil and lime zest and juice with 1 teaspoon of salt in a large bowl.

2. Cover the bowl and refrigerate it for at least 30 minutes or up to 1 hour, tossing a couple of times.

3. Taste the salad and season it with additional salt and lime juice if needed.

4. Toss in ¼ teaspoon of the chili powder and half of the mint.

5. Transfer the salad to a serving bowl.

6. Sprinkle the salad with your remaining ¼ teaspoon of chili powder and remaining mint.

PRO TIP 1: Martin recommends tossing the fruits and vegetables with the lime juice and olive oil about 30 minutes before you plan on serving. He also suggests keeping your salad on ice if you're at a picnic: “The refreshing bite of melon and crunchy radish dusted with chili powder is even more enjoyable when it is ice cold.”

PRO TIP 2: Don’t forget to taste the salad after chilling because cold can blunt the flavor. In other words, the salad may require extra seasoning after chilling – even if the salt level tasted fine before refrigerating.

Miso-Glazed Grilled Peaches

Miso-glazed grilled peaches are pictured atop parchment paper.
Miso-Glazed Grilled Peaches
Courtesy Amy Kimoto-Kahn

By Amy Kimoto-Kahn. Serving size: 6

Kimoto-Kahn says: “When peaches are in season, there’s nothing more juicy, sweet and succulent. Sweet peaches meet umami-rich miso in this elegant side or dessert, finished with aromatic shiso for a distinctly Japanese twist on grilled fruit.

INGREDIENTS

  • 3 ripe peaches, halved and pitted
  • 1 tablespoon white miso paste
  • 1 tablespoon honey
  • 1 tablespoon mirin (a Japanese sweet rice wine)
  • 1 tablespoon olive oil
  • Fresh shiso or mint leaves to garnish

DIRECTIONS

1. Mix the miso, honey, mirin and olive oil in a bowl until smooth.

2. Brush each cut side of the peaches with the glaze you just made.

3. Grill the peaches on medium-high for 3-4 minutes until grill marks appear.

4. Garnish the peaches with shiso or mint leaves.

5. Serve at any temperature, though warm is ideal.

PRO TIP: Grill the peaches ahead of time and pack them in a shallow container with parchment paper between layers. Slice them into quarters and serve them chilled or at room temperature on small skewers, or with cocktail forks for a no-mess finger food.

Quinoa Salad With Pineapple, Cilantro and Lime

A quinoa salad with pineapple, cilantro and lime is pictured in a bowl atop a countertop.
Quinoa Salad with Pineapple, Cilantro and Lime
Courtesy Erik Bernstein

By the recipe developers at Christopher Kimball’s Milk Street. Serving size: 4

“Here is a protein-packed healthy salad that can be made ahead,” says Martin. “If bringing this salad along to a picnic, simply pile the chopped cilantro on top of the salad and toss it all together when ready to serve. This will keep your herb leaves fresh and vibrant, when they can otherwise wilt in the tart lime-based dressing.”

INGREDIENTS

  • ½ medium red onion, thinly sliced
  • 2 Fresno chilies, stemmed, seeded and thinly sliced. Or 1 small red or orange bell pepper, stemmed, seeded and finely chopped
  • 1 teaspoon grated lime zest, plus 3 tablespoons lime juice, divided
  • 1 cup quinoa, preferably rainbow (tricolor) quinoa, rinsed and drained
  • Kosher salt
  • Ground black pepper
  • 2 cups chopped fresh pineapple or thawed frozen pineapple chunks
  • 2 tablespoons extra-virgin olive oil
  • ¾ cup lightly packed fresh cilantro, roughly chopped
  • Toasted unsweetened coconut or chopped roasted cashews as an optional garnish

DIRECTIONS

1. Combine the onion, chilies and lime juice in a large bowl and set the mixture aside.

2. Toast the quinoa in a medium saucepan over medium-high heat, stirring occasionally, until crackling occurs (about 3 minutes).

3. Stir 2 cups of water and ½ teaspoon of salt into the quinoa.

4. Bring the quinoa to a boil.

5. Cover the quinoa, reduce the heat to low and simmer, without stirring, until the liquid is absorbed (about 13-15 minutes).

6. Remove the quinoa from the heat and let it stand, covered, for about 10 minutes.

7. Stir the pineapple, oil and ¼ teaspoon of salt into the onion mixture from step 1.

8. Use a fork to fluff the quinoa after the 10 minutes of resting.

9. Add the quinoa to the onion-pineapple mixture and toss.

10. Let the salad cool until barely warm to the touch (about 20-30 minutes), tossing a few times. Stir in the lime zest and cilantro.

11. Season your salad with salt and pepper to taste.

12. Garnish with the toasted unsweetened coconut or chopped roasted cashews, if desired.

Unlock Access to AARP Members Edition

Join AARP to Continue

Already a Member?

Red AARP membership card displayed at an angle

Join AARP for just $15 for your first year when you sign up for automatic renewal. Gain instant access to exclusive products, hundreds of discounts and services, a free second membership, and a subscription to AARP The Magazine.