Javascript is not enabled.

Javascript must be enabled to use this site. Please enable Javascript in your browser and try again.

Skip to content
Content starts here
CLOSE ×

Search

Leaving AARP.org Website

You are now leaving AARP.org and going to a website that is not operated by AARP. A different privacy policy and terms of service will apply.

How to Fix Any Style Emergency — Fast

Don’t let a stuck zipper, sweater pilling or drooping hem dull your sparkle

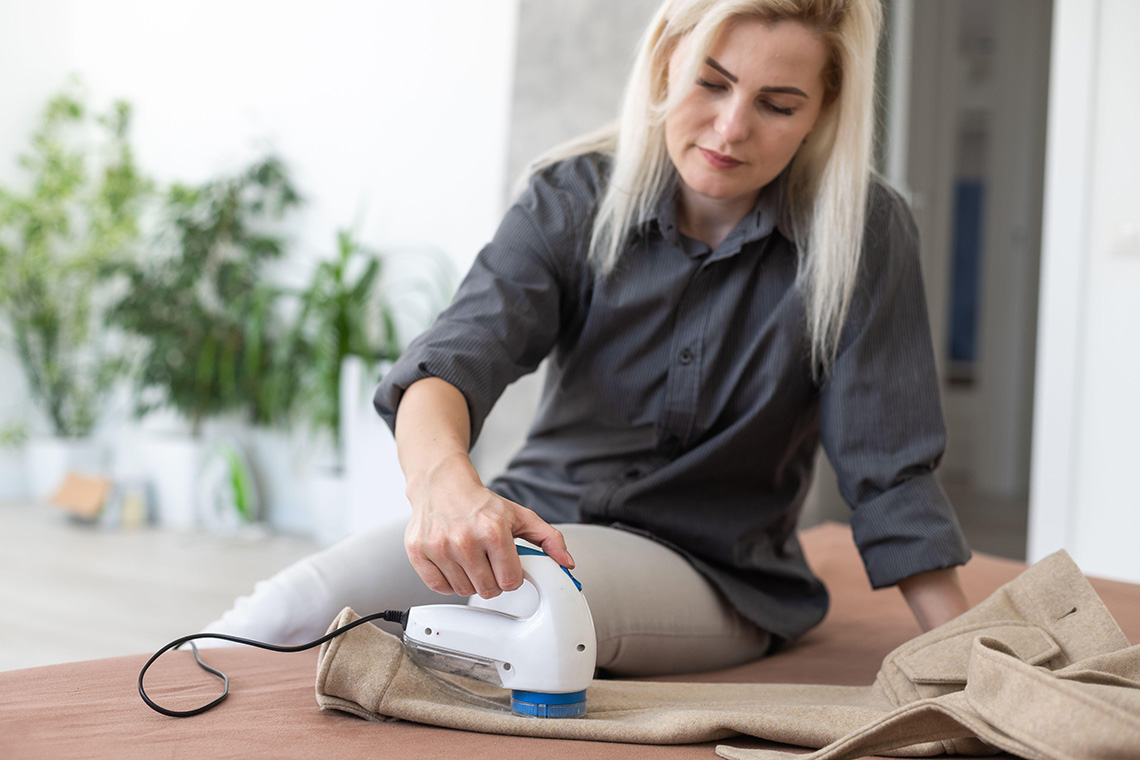
spinner image A woman uses a fabric shaver for removing pellet and spools from clothes and fabric on trousers
A woman using a fabric shaver on her clothes.
Andrew Angelov/Alamy Stock Photo

Panty lines wrecking your ponte pants? Bra straps ruining your cold-shoulder top? Final-sale booties feel too tight? While hardly in the disaster category, such fashion mishaps can strike at any time. Having an emergency kit in your closet or ready-made solutions such as laser-cut briefs and a wardrobe of bras helps, but what about when you’re running late, at work, en route to a party or traveling? Here are the DIY solutions that make the difference between looking hot or like a hot mess when:

1. A zipper gets stuck

A last-minute zipper jam is frustrating whether it’s a work skirt or leather biker jacket. Usually, the problem is a tiny bit of fabric that’s stuck in the grooves of the zipper teeth. First thing to try is a classic wooden pencil — the kind you used in school — not a mechanical one. Rub the lead point on the teeth until they turn gray. Then try slowly sliding the pull up or down. No pencil or it didn’t work? Look around for a handy lubricant like candle wax, a bar of soap, a crayon or even your lip balm and rub it generously on the zipper and teeth. Use one hand to firmly grip the material, the other to hold the slider part, and try to work the zipper down one tooth at a time. Keep moving your grip down to tuck more fabric out of the way as you go. Once unstuck, clean off the residue with a damp cloth. If you’ve pulled off the zipper tab in your efforts to free it, slip a twist-tie or ribbon through the slider.

spinner image Image Alt Attribute

AARP Membership— $12 for your first year when you sign up for Automatic Renewal

Get instant access to members-only products and hundreds of discounts, a free second membership, and a subscription to AARP the Magazine.

Join Now

2. A favorite sweater has pulls or pills

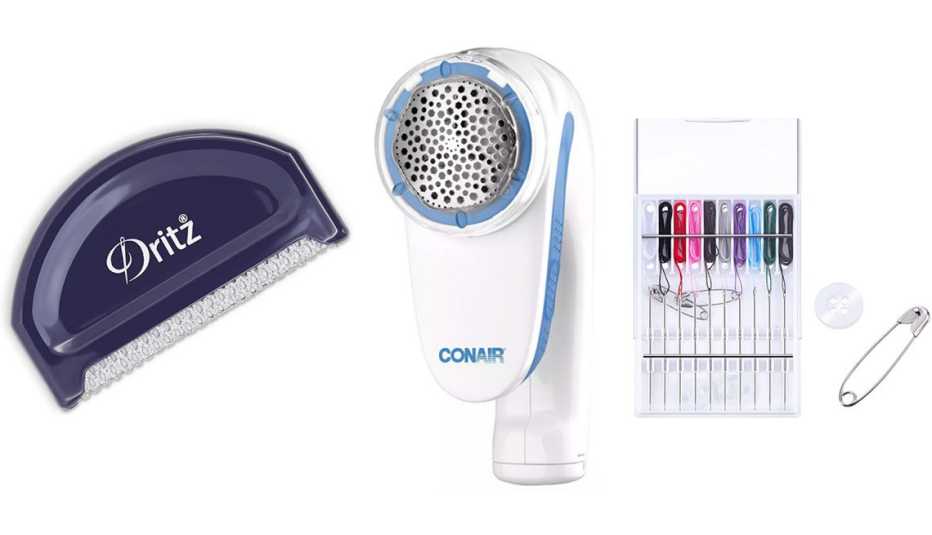
spinner image Dritz Sweater Comb; Conair Battery Operated Fabric Defuzzer/Shaver; Hestya Pre-Threaded Needle Kits
(Left to right) Dritz Sweater Comb ($9, walmart.com); Conair Battery Operated Fabric Defuzzer/Shaver ($15, target.com); Hestya Pre-Threaded Needle Kits ($6, amazon.com)
Walmart; Target; Amazon

Frustrating, yes, but don’t throw it in the donation pile yet. For pulls on loosely knit sweaters thread a needle (in a color that matches the sweater) and loop it around the pull. Then pull that through to the inside and knot in place before cutting the thread. A pre-threaded needle makes this (and other emergency tasks like sewing on buttons) stress-free in the future. Pilling — the worn look of tiny wool balls — caused by age, laundering, friction and wear can be removed with a store-bought sweater comb or shaver. If you don’t have one on hand, try this DIY duct-tape method. Cut a four-inch piece and smooth it firmly over the pilled area. While holding the sweater firmly, quickly pull off the tape along with the fuzz balls. Repeat if necessary.

3. Bra straps show in your sleeveless dress or sweater

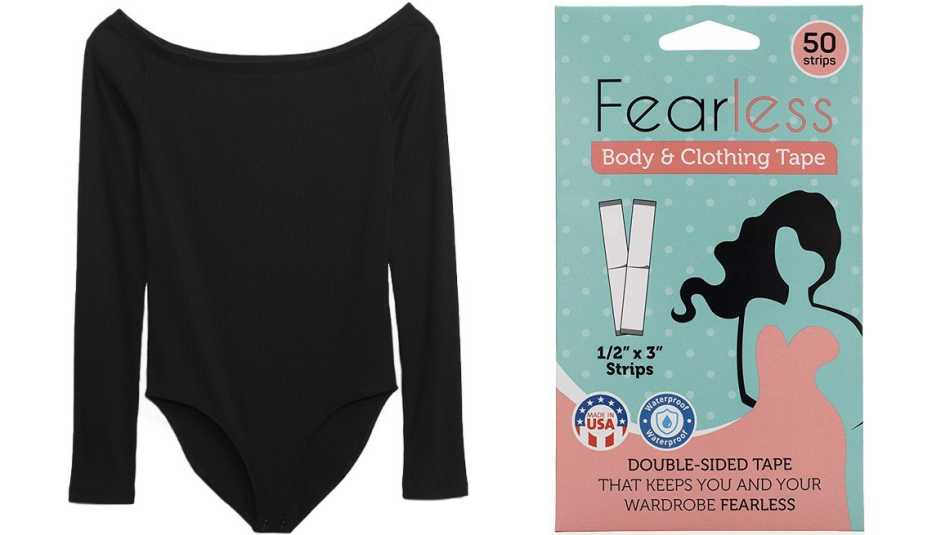
spinner image Gap Off-Shoulder Rib Bodysuit in Black; Fearless Tape Women’s Double-Sided Tape for Clothing and Body
(Left to right) Gap Off-Shoulder Rib Bodysuit in Black ($45, gap.com); Fearless Tape Women’s Double-Sided Tape for Clothing and Body ($11, amazon.com)
Gap; Amazon

Most women wear a two-strap everyday bra not a racerback or multi-way convertible style. However, straps can get in the way of trendy off-shoulder and cold-shoulder necklines, sleeveless tops and dresses and boatneck, V- and square-necked tops. One fast fix for wide necklines is to safety pin each strap on the inside of the garment just beyond the neckline or use double-stick tape to secure the straps beyond exposure inside the top. For sleeveless styles and deeply scooped cold-shoulder looks, fake a racerback bra by clipping the two bra straps together at center back with a large safety pin. And lastly, sometimes the best bet is to turn your everyday bra into a temporary strapless one. Simply slide the straps off your shoulders and under your arms and tuck them into the bra band. If you’re wearing the right bra size, the cups and band will provide enough support to get you through the day or night.

4. Your jeans shrank in the wash

Uh-oh. While stretch jeans offer more flexibility even those with spandex, and certainly all-cotton jeans, can shrink in the dryer, especially at the waist and belly. When this happens, water is the answer. Start by wetting the jeans down — either by washing them, misting the snug areas with water or soaking the jeans in a tub of lukewarm water with a little hair conditioner. All three solutions will help loosen the fibers. Then physically pull the wet jeans in all directions lengthwise and widthwise to stretch the fibers further. Really tug them with both hands! Lay the jeans flat to air dry. Do not put them in the dryer or you’ll have to repeat the whole routine.
Shopping & Groceries

Walmart+

$20 off a Walmart+ annual membership

See more Shopping & Groceries offers >

5. The outfit you planned to wear is a wrinkled mess

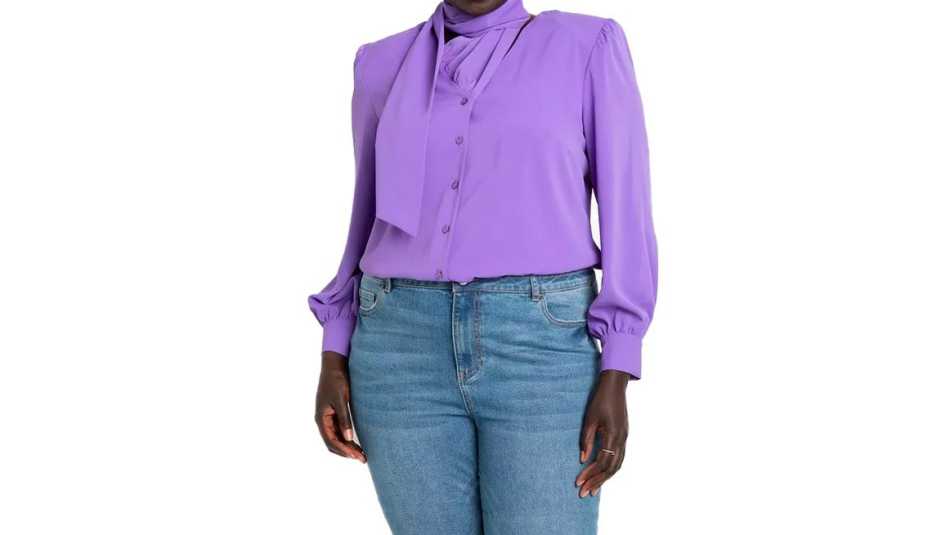
spinner image Eloquii Button Front Scarf Blouse in Dahlia Purple
Eloquii Button Front Scarf Blouse in Dahlia Purple ($70, eloquii.com)
Eloquii

This strikes when your clothes rack is too crammed … or you’re on vacation and you’ve overpacked your suitcase. But in these days of wash-and-wear casual dressing, irons have become nearly obsolete. There are three other heat-based ways out. You can place the item in the dryer with a damp (not wet) washcloth for five minutes and remove immediately. Try misting the wrinkled areas with water and zap them with your hair dryer on medium heat for two minutes (not too close to the garment though, and keep the dryer moving!). Or you can turn on the shower for 10 minutes and hang the pants/dress/blouse in the steamy bathroom to smooth out the creases and crimps.

6. Your sweater or blouse has “hanger bumps”

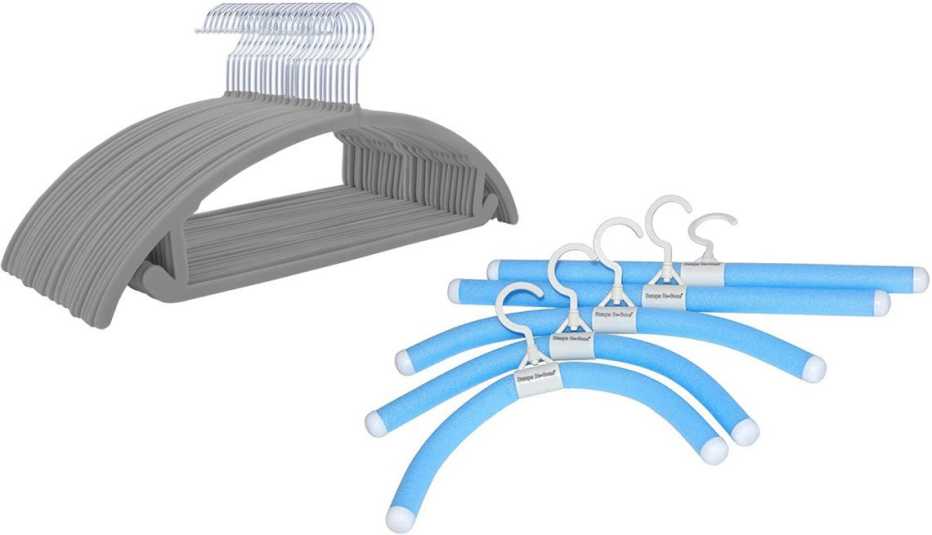
spinner image MIZGI Velvet No-Slip, No Shoulder Bump Hangers; Feel Kozi No-Bumps Hangers
(Left to right) MIZGI Velvet No-Slip, No Shoulder Bump Hangers ($30, amazon.com); Feel Kozi No-Bumps Hangers ($38, amazon.com)
Amazon (2)

Try rubbing an ice cube over the nubs or put the top on, wet your fingers and rub them back and forth over the extended raised spots using your own shoulders for support. Both work for fine gauge knits and the silkiest blouses. For heavier knits or items that have been hanging on wire dry-cleaner hangers (the worst offenders) try the shower steam method in tip number 5 and lay the items flat or over the tub ledge to gently relax the ridges. Be sure you leave enough time for this, since the moist air may dampen the top, requiring a fast two-minute spin in the dryer or a quick zap with the blow dryer. Moving forward, always fold knits and sweaters for storage on a shelf or in a drawer or use round-shoulder hangers to avoid the entire situation.

spinner image membership-card-w-shadow-192x134

LIMITED TIME OFFER. Join AARP for just $9 per year when you sign up for a 5-year term. Join now and get a FREE GIFT!

7. Your new final-sale pumps are too tight

Squeezing your feet into shoes or boots that are too narrow or toe-pinching pointy is never a good idea, but leather or faux leather does respond to a DIY stretch. There are two fixes. First, try slipping on a pair of thick socks with the shoes at home. Yes, you’ll feel jammed in there but be patient. Aim your blow dryer (on medium setting) at the tight spots till they feel comfortable. Keep moving the nozzle back and forth. The heat will soften the leather just enough for a comfier fit. Second, if you have more time, fill a plastic baggie with water (make sure there is no excess air and seal it tight!) and slip it inside the shoe where it hurts, for example in the toe box or heel or at the vamp. Put the water-baggie filled shoes in the freezer overnight. As the water freezes to ice it expands the shoe, stretching it and adding just the roomy effect you need by morning.

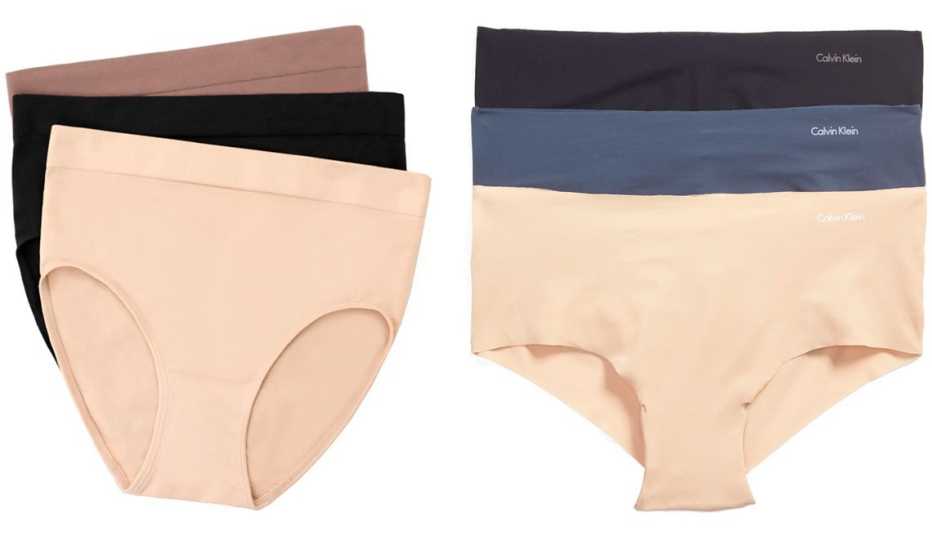
8. Panty lines are ruining your look

spinner image Wacoal B-Smooth Assorted 3-Pack High Cut Briefs; Calvin Klein Invisibles Hipster Briefs
(Left to right) Wacoal B-Smooth Assorted 3-Pack High Cut Briefs ($39, nordstrom.com); Calvin Klein Invisibles Hipster Briefs ($35, nordstrom.com)
Nordstrom (2)

You love the fit of those ponte pants and winter white jeans but all you see are crinkles, bumps and bulges created by the panties beneath. This is a case for buying laser-cut seamless panties forevermore. Still, in a pinch, your best bet is to cut off the legs of a pair of pantyhose at mid-thigh and wear them as undies. It doesn’t matter whether they are sheer or opaque, the point is there won’t be any squeezing elastic at waist or leg to mar your silhouette. No pantyhose? Slip on a pair of exercise bike shorts or low-compression mid-thigh shape-wear shorts and call it a day.

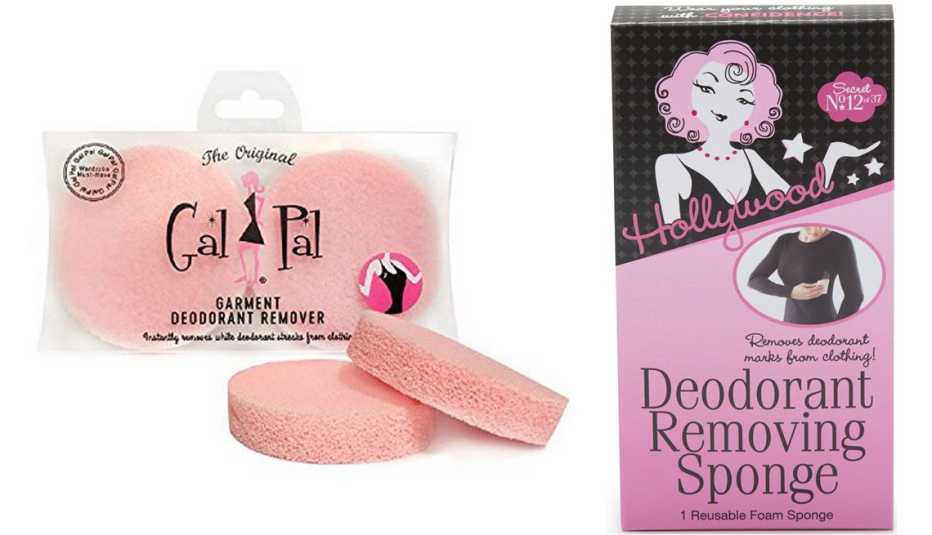
9. Deodorant stains on your favorite black top

spinner image Gal Pal Deodorant Remover Sponge; Hollywood Fashion Secrets Deodorant Removing Sponge
(Left to right) Gal Pal Deodorant Remover Sponge ($11, walmart.com); Hollywood Fashion Secrets Deodorant Removing Sponge ($10, amazon.com)
Walmart; Amazon

Women who wear black T-shirts are familiar with this annoying issue. You’re set to go, but when pulling the top over your head you leave white deodorant streaks on the fabric. First up: Rub the residue briskly with the fabric itself or try doing the same with a pair of black pantyhose, knee-high socks or leggings, or grab a used dryer sheet (not a fresh one) to erase the streaks. In the future, make deodorant-removing fashion sponges a closet essential and use this stylist’s trick when getting dressed to keep deodorant away from the outside of your clothes. Roll up the bottom hem of the top or dress as you slip it on and then unroll. And do your clothes a favor: Switch to a clear gel deodorant for no marks to worry about.

10. Last-minute hem issues

Hem snags usually happen when the hem catches on the heel of your shoe as you slip on clothes or rise from sitting. First rule for the future: Never slide on pants, skirt or dress feet first when wearing shoes. Double-stick tape or duct tape (see tips number 2 and 3) work effectively to shore up a loose hem, but you’ve got to have them handy. In a pinch use any tape — even gift-wrapping tape — short-term. Just apply a strip the length of the hem, fold it back in place and apply firm pressure to seal the deal. In truth, I’ve used bobby pins, paper clips and even chewing gum (ahem!) to hold pant hems in place when tape wasn’t available. For jeans that are too long, simply snip the excess and opt for a frayed-edge look. You can also turn any loose maxi dress into an instant midi, and any midi into a knee-length without sewing. Just add a belt at the waist and pull the fabric up and over the belt a few inches to create a blouson on top. This works best with loose sweater or tiered dresses and automatically lifts the hem to your desired length.

Discover AARP Members Only Access

Join AARP to Continue

Already a Member?