Javascript is not enabled.

Javascript must be enabled to use this site. Please enable Javascript in your browser and try again.

Skip to content
Content starts here
CLOSE ×
Search
CLOSE ×
Search
Leaving AARP.org Website

You are now leaving AARP.org and going to a website that is not operated by AARP. A different privacy policy and terms of service will apply.

Dorie Greenspan’s Devil’s Chocolate Cake Recipe

Excerpted from ‘Dorie’s Anytime Cakes’ by Dorie Greenspan


a photo shows Dorie Greenspan’s devil’s chocolate cake
The Devil’s Chocolate Cake was inspired by the iconic Ebinger’s Black-Out Cake.
Nancy Pappas

In the summer of 2004, I printed out my manuscript for Baking: From My Home to Yours to mail to my editor. I was happy and tired. I’d worked on the book for years, and I was ready to put my cake pans on a shelf for a while and take a little time off before the edits and photo shoot would begin.

But that night, Michael started reminiscing about an iconic chocolate cake from our childhoods: Ebinger’s Black-Out Cake. It was a dark chocolate layer cake, sandwiched with a kind of pudding-ish chocolate cream, frosted with chocolate and covered with crumbled cake. Then came the question: Do you think you could make it? So much for stowing the pans. I pulled a couple down and set to work. I made a few cakes, but none matched our memory. And then I made a cake that was so good that neither of us cared that it wasn’t the cake. Mine was close, but because I couldn’t ace the frosting or the filling, I turned everything around and went from chocolate filling and frosting to vanilla meringue. I kept the crumb coating and called it Devil’s Food White-Out Cake. We loved it! We loved it so much that I sent it to my editor asking if she could squeeze it into the book. The latecomer made it into the book and then ended up on the cover! A better-late-than-never story with a surprise ending.

I baked that cake a few more times, but eventually stopped thinking about it because I was working on other recipes. Then, just as I was closing in on the finish line for this book, a friend wrote to tell me how much she liked the White-Out Cake and how often she made it. It was enough encouragement for me to revisit it: the cake was just as good as I’d remembered it. And, unexpectedly, it was excellent without filling, frosting or crumbs. I made it in a Bundt pan and only wished I’d thought to do it sooner.

Because there are no layers and no thick cushions of sweet frosting, all of devil’s food’s delights are amplified — the chocolate flavor is so full that it’s almost demonic, and the texture is bold. That it looks like your everyday Bundt, that it’s made like any old cake and that it uses the basic ingredients of so many chocolate cakes just makes the fact that it’s outstanding more remarkable. Bedeviling, really.

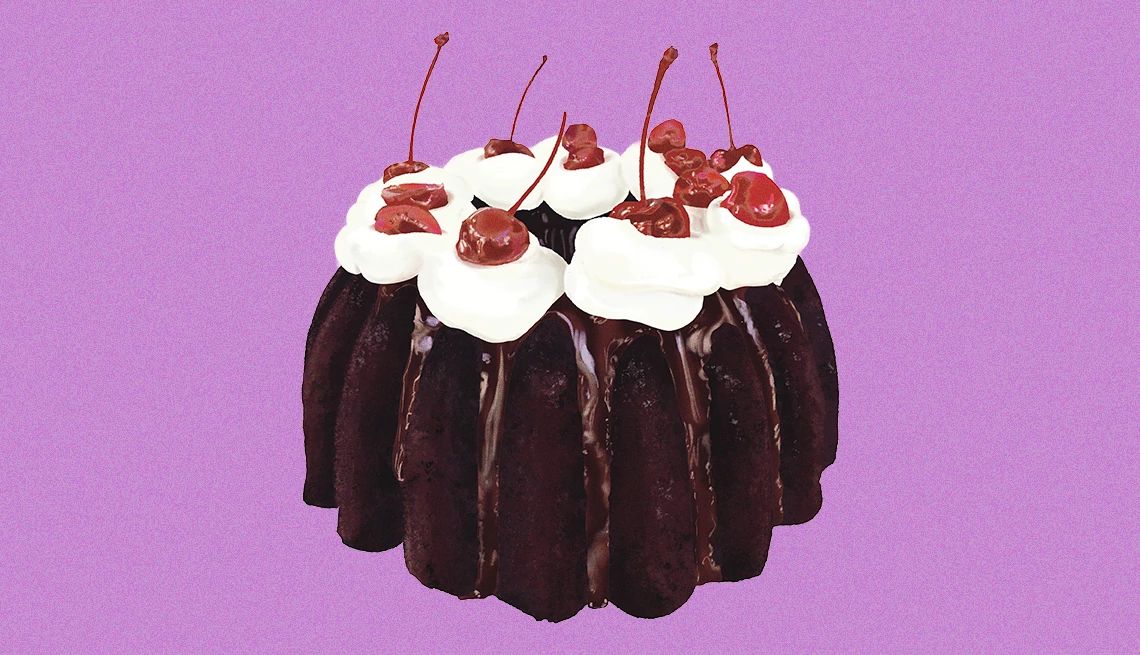
A cake this good is good plain, great with chocolate glaze, a bit greater with glaze and pufflets of whipped cream and greatest with glaze, whipped cream and cherries on top. Or sprinkles. Or berries. Or shaved chocolate. Go wild. It’s what the devil would want you to do.

The Devil’s Chocolate Cake

Makes 10-12 servings

Ingredients 

For the cake:

1⅓ cups all-purpose flour

½ cup unsweetened cocoa powder, sifted if lumpy

¾ teaspoon baking soda

½ teaspoon baking powder

½ teaspoon fine sea salt

10 tablespoons (5 ounces) unsalted butter, at room temperature

½ cup sugar

½ cup brown sugar

3 large eggs, at room temperature

1½ teaspoons pure vanilla extract

2 ounces semisweet or bittersweet chocolate, melted and cooled but still fluid

½ cup whole milk, at room temperature

½ cup boiling-hot coffee (can be made with instant) or boiling water

4 ounces additional semisweet or bittersweet chocolate, finely chopped, or a generous ½ cup mini chocolate chips

For the topping, one or a combination (optional): 

Glossy Chocolate Glaze (recipe follows)

Whipped Cream (recipe follows)

Maraschino or Amareno cherries

Sprinkles or grated or shaved chocolate

Directions

To make the cake: Center a rack in the oven and preheat it to 350 degrees F. Coat the inside of a 10-cup Bundt pan with baker’s spray or butter the pan, dust it with flour and tap out the excess.

Whisk together the flour, cocoa, baking soda, baking powder and salt.

Put the butter in the bowl of a stand mixer fitted with the paddle attachment, or in a large bowl if you’re using a hand mixer. Add both sugars and beat on medium speed until soft and creamy, about 4 minutes, stopping often to scrape the bowl and beater(s). One by one, drop in the eggs, beating for a minute after each is incorporated. Beat in the vanilla, scrape and don’t be upset if your batter looks curdled — it may not be pretty now, but it will be beautiful soon. Turn the mixer to low and blend in the melted chocolate. Beat in the flour-cocoa mixture in three additions and the milk in two, beginning and ending with the dry ingredients and scraping often. When everything’s incorporated, and with the mixer still on low, slowly pour in the boiling coffee or water — the neatest way to do this is to pour it down the side of the bowl; the liquid will thin the batter dramatically. Switch to a flexible spatula and stir in the chopped chocolate. Pour the batter into the pan — it is so thin that it will level itself.

Bake for 33 to 38 minutes, or until the cake has risen — it will rise in the center around the pan’s hole — and a tester inserted into the center of the cake comes out clean; gently tug, and the cake will pull a little from the sides of the pan. Transfer the cake to a rack and wait for 5 minutes, then unmold the cake onto the rack and allow it to cool to room temperature.

To finish the cake (optional): If you’d like to glaze the cake, put the rack on a piece of parchment paper or a lined baking sheet (you need a drip-catcher) and pour the glaze over the cake. If you want to add whipped cream and fruit, do that just before serving. It’s easiest and prettiest to fill a pastry bag (or use a plastic bag with a bottom corner snipped off) with the cream and pipe puffs or swirls on the cake’s curves. And, if you want to go all out, put a cherry on top of each cushion of cream. To go all out-er, shower the cake with sprinkles or grated or shaved chocolate. 

Storing: Wrapped, the plain cake will keep for about 3 days at room temperature or for up to 1 month in the freezer; thaw in the wrapper. If you want to freeze the glazed cake, put it in the freezer to firm and then wrap it; thaw in the wrapper. Just before serving, warm the glaze with a few puffs of air from a hairdryer — the gloss will return. Since whipped cream won’t keep, add it just before serving.

Glossy Chocolate Glaze

Makes about ½ cup

Ingredients

4 tablespoons (2 ounces) unsalted butter, cut into 8 pieces

4 ounces bittersweet or semisweet chocolate, chopped

1½ tablespoons light corn syrup

Directions

Set a heatproof bowl over a pan of gently simmering water, making sure the bottom of the bowl does not touch the water. With the pan over low heat, drop in the pieces of butter, followed by the chocolate and corn syrup. Heat, stirring frequently, until the butter and chocolate are melted and the glaze is smooth and shiny. Be careful not to overheat it — you don’t want to break the emulsion. Remove from the heat.

The glaze is ready to use, but if you want a thicker glaze, let it stand for 5 to 10 minutes before using. Pour out a little to test its viscosity.

Storing: It’s best to use the glaze soon after it’s made, but it can be kept in the refrigerator for about 5 days. Heat it very gently — use the same bowl-over-hot-water method — stirring to bring it back. You can also freeze the glaze. Pack it airtight, then defrost it overnight in the refrigerator and reheat over gently simmering water.

Whipped Cream

Makes about 2 cups 

Ingredients

1 cup very cold heavy cream

2 tablespoons confectioners’ sugar, or more to taste, sifted if lumpy

1 teaspoon pure vanilla extract (optional but recommended)

Directions

Working in the bowl of a stand mixer fitted with the whisk attachment, or in a large bowl with a hand mixer, beat the cream and sugar together on low speed just until the cream starts to thicken. Taste and see if you’d like a little more sugar and, if so, add it now. Continue beating until you’re just shy of the consistency you want. I start beating on low-medium speed, then increase the speed to medium/medium-high and beat until the texture of the cream is almost what I want, and then finish the cream by hand with a whisk to avoid overbeating. When you like what you’ve got, beat in the vanilla (if using).

Storing: Whipped cream is best soon after it’s made, but you can keep it refrigerated for a few hours. To hold the cream for up to 24 hours, line a strainer with damp cheesecloth or a couple of damp paper towels, set the strainer over a bowl, scrape in the whipped cream, cover and refrigerate.

Excerpted from Dorie’s Anytime Cakes by Dorie Greenspan. Copyright 2025 by Dorie Greenspan. Used with permission by Harvest, an imprint of HarperCollins. All rights reserved.

Unlock Access to AARP Members Edition

Join AARP to Continue

Already a Member?