AARP Hearing Center

These days, social media influencers and fitness blogs are full of “booty challenges” and tips on how to build a shapely backside. But strengthening your glutes isn’t just about aesthetics.
These large, powerful muscles in your buttocks support your pelvis and lower back, stabilize your hip joints and help you maintain good posture, says Greg Hartley, a geriatric physical therapist and an associate professor at the University of Miami.
Your glutes are also critical for the activities of daily life, he says: “They help you be strong when you’re standing, so you can stand up straight. They help with balance and walking.” And, significantly, they help with getting up from a chair or out of bed.
#1 Exercise Series
Do these to stay strong as you age
Older adults may not care about building a “booty shelf,” but strengthening the glutes is key to staying active, independent and steady on our feet. Doing glute exercises can also help with lower back pain. In a 2024 study published in the journal Scientific Reports, researchers in Taiwan found that participants who did glute-strengthening exercises along with lower back stabilization exercises experienced a significant reduction in back pain, along with improved lower back muscle strength, flexibility and hip-muscle strength.
Another small 2024 study published in Medicina found that people with chronic lower back pain had less off it, and a better quality of life, when they added glute-strengthening to their core exercises, compared with doing core work alone.
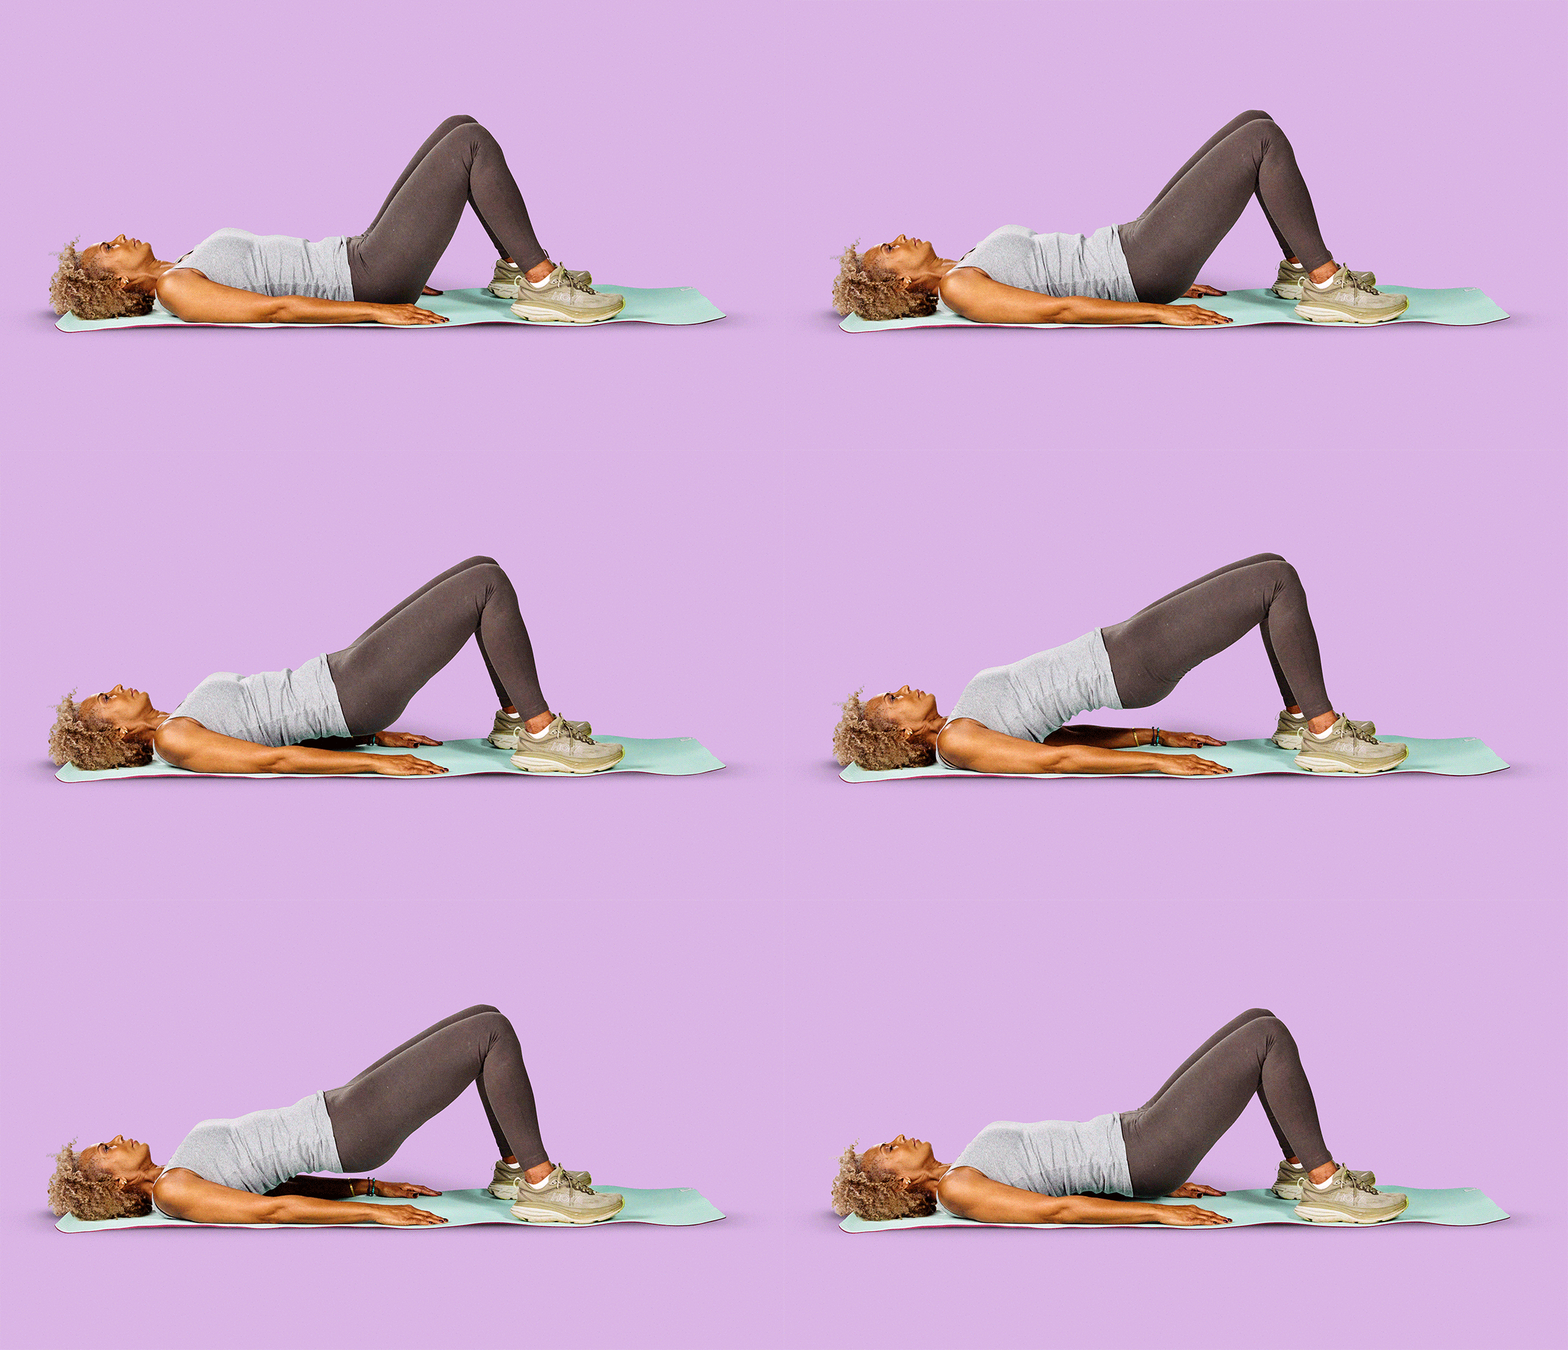
While many different exercises target the muscles in your buttocks, one of the simplest and most effective is the glute bridge, Hartley says. It strengthens the hamstrings and lower back muscles in addition to the glutes. Hartley also likes the glute bridge because it’s easy and safe. You can’t fall, because you’re already on the floor. And there’s no equipment involved.
How to do a glute bridge in four steps
Here is a step-by-step guide to performing a glute bridge. Remember to talk to your doctor before beginning any new exercise routine. And if you feel pain with movement, stop and consult a health care provider or physical therapist.
1. Lie on your back on the floor with your knees bent, feet flat on the floor, hip width apart, and your hands at your sides. Keep your toes pointed straight ahead, and position your feet so that they’re directly underneath your knees. If you are unable to get up and down from the floor, you can perform this exercise on a bed. Squeeze your glutes, tighten your abs to lock your spine, and drive through your heels to push up your hips and buttocks. Your body should form a straight line from your knee to your shoulder. Make sure you don’t arch your back.
3. Hold the upright position for five seconds, then slowly (for a count of four) lower your body to the starting position. The movement should be slow and controlled.
4. Try to do 8 to 12 reps, or as many as you comfortably can based on your fitness level. Reaching your arms to the ceiling as you move will make it more challenging. For an advanced variation, try single-leg bridges: Start in the same position but extend one leg straight, then push up with the leg that remains bent.
Editor’s note: This article, originally published January 9, 2025, has been updated with new information, responses to reader comments and a medical review.















You Might Also Like
Yoga Poses to Fight Osteoporosis
Build bone mass with these five easy moves
Doctor, How Can I Lose Weight?
A physician's advice for dropping a few pounds
25 Great Ways to Get a Flatter Stomach
Tips on how to lose belly fat and get a tighter tummy