Javascript is not enabled.

Javascript must be enabled to use this site. Please enable Javascript in your browser and try again.

Skip to content
Content starts here
CLOSE ×

Search

Leaving AARP.org Website

You are now leaving AARP.org and going to a website that is not operated by AARP. A different privacy policy and terms of service will apply.

11 Ways to Refresh Your Clothes and Closet

Prep your wardrobe for spring and summer with these DIY tips

spinner image A woman in her bedroom looking at clothes and shoes in the closet
Guerilla/Getty Images

Since we're hunkering down at home for who knows how long, why not use this time for some wardrobe rehab? Everyone feels a bit stressed, but instead of binge-buying online let's keep our credit cards clear of extra expenses whenever possible. Even if you haven't picked up a needle and thread since eighth grade Home Ec class, these easy DIY tricks will perk up your same old clothes and shoes for a fresh start.

1. Prioritize what to do

Start with warm weather clothes and accessories for now and leave restoring winter items, boots, pumps and dressy shoes and serious tailored work clothes for the future. Divide repairs into piles: rips and holes, hems and buttons, laundry and stains, shoes and costume jewelry. Don't attempt to do everything at once or cherry-pick as you go. Focus on one specific task a day. Then feel good when you accomplish it.

spinner image Image Alt Attribute

AARP Membership— $12 for your first year when you sign up for Automatic Renewal

Get instant access to members-only products and hundreds of discounts, a free second membership, and a subscription to AARP the Magazine.

Join Now

2. Be OK with good enough

You are not Coco Chanel. Heck, you are not even Martha Stewart (or a shoe-repair guy, a dry cleaner or a fashion stylist). Unless you have your own sewing machine and are a whiz at doing this sort of thing, lower your standards. Know that double-faced tape or duct tape works remarkably well if you don't have the patience or stuff for a quick stitch-up of dangly hems. It's also fine to swap in other household essentials for real supplies in this pinch.

3. Stitch up with confidence

If you can thread a needle — and have one — you're good to go, just be sure to turn whatever you're working on inside out before you start, double up the thread and knot the end. Know a basic backstitch is sturdier than a running stitch. (This means your needle goes into the fabric and behind the first stitch to reinforce it.) A simple whipstitch — your needle goes over and around to close two edges in overhand loops — is best on seams, holes and tears. If you don't have a kit of thread colors handy (even my own stash of hotel room sewing kits has vanished!) keep it simple and use black thread for darks and brights, white for white and light.

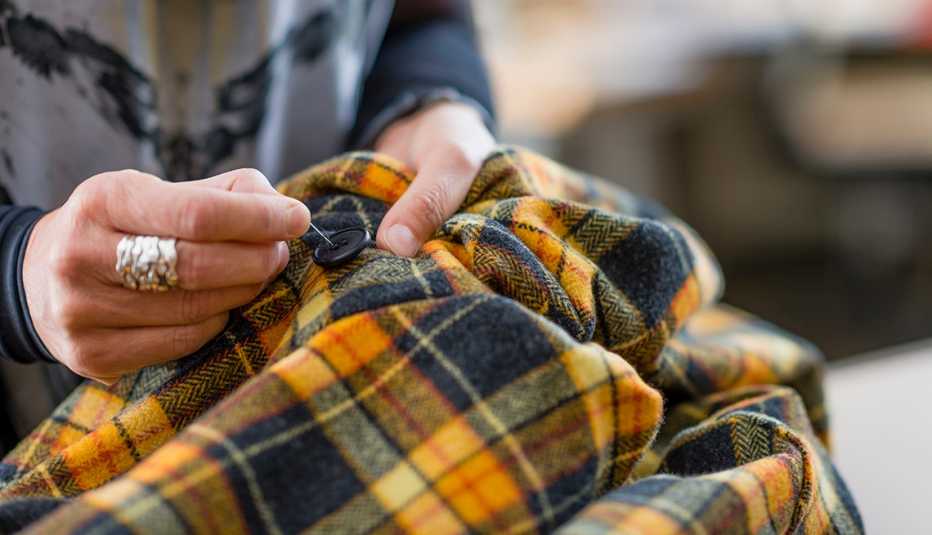
spinner image A close up of a woman hand sewing a button onto a jacket
Atli Mar Hafsteinsson/Cultura/Getty Images

4. Fix loose and missing buttons right away

Naturally it's easier to reattach a button than to try to find a replacement. Either way be sure to reinforce any button you sew on with this trick. Finish by pushing the needle down through the button and wrap the thread around the underside of it five times to form a shank or neck. Then push the needle down into the material and secure the button from the underside of the garment with a few final stitches. It'll last. Replace a prominent missing button with one from a less noticeable spot — moving the bottom button from a blouse to a missing spot mid chest, for example. No thread and a loose button? Swipe some clear nail polish over the top of the button and thread to temporarily slow things down, or safety pin from the inside.

5. Trim long jeans to make them stylish

Jeans dragging on the ground? Consider cutting long jeans to a cropped ankle length. The frayed hem is fashionably cool so no hemming required! Lay the jeans on a flat surface inside out, use any available straight edge to mark the length you want with a pen, and snip. Machine wash and partially dry, trim long straggly strands to a neat frayed edge.

See more Health & Wellness offers >

6. Darn your socks and leggings and fix sweater pulls

This old-school task will keep your everyday basics going for months. Flip sneaker socks and leggings inside out and stretch the gap over a tennis ball, apple or orange before using an overstitch to bring the edges together in a neat seam. Perfect? No, but usable? Sure. To make pulled threads on lightweight knit pullovers and cardigans less noticeable, try tugging the pull back under by gently using fingers on either side of the pull to stretch the fabric outward. Do the same top and bottom in a light tugging motion. Then turn the garment inside out and use a needle to carefully grab the loose thread and pull it back through.

7. Help your hoodies and sweatpants

Sticky or stuck zippers and drawstrings that escaped in the wash just need some TLC and patience. Attach a safety pin to one end of the drawstring and begin feeding it through the track in the waistband or hood. The pin provides a smoother guide than the string itself. Work slowly inch by inch and when the pin fully emerges remove it and make an extra-large knot to prevent a recurrence. Rub zipper teeth with some petroleum jelly to help restore the glide.

8. Revive last year's summer shoes

Worn soles and heels are beyond our skill set and who has shoe polish lying around? We can still quickly reboot our sandals, flats and sneakers. First, buff off any dirt and street crud with a soft cloth. Water stains from the beach or walks in the rain? Dab spots on leather and dirty white sneakers with a 1:1 ratio of water and white vinegar on a cotton ball and let dry. Remove dirt on leather sandals or kicks with a sudsy mix of water and dishwashing liquid or hand soap, scuffs on patent leather with petroleum jelly on a Q-tip. Polish dry, dull leather shoes with a dab of moisturizer, body lotion or hair conditioner to restore gleam and a supple texture. Sprinkle insides of stinky shoes and sneakers with baking soda (or cat litter) and leave overnight. In the morning, remove all residue. Done!

9. Treat clothes before washing

We're not exactly sloppy but while sitting on the couch nibbling pizza or sipping a glass of wine, stains do happen. If you don't have a stain stick, wipe or enzyme presoak handy, these retro DIY prewash tips work well. Dab grease stains (like pizza, butter, salad dressing, makeup) with a dry paper towel (not water!) and immediately apply baby powder, cornstarch, salt or even artificial sweetener to absorb the oil, or try a sudsy mix of dishwashing liquid to prevent the stain from sinking in. Blot red wine or tomato sauce with a white cloth, napkin or even a slice of bread (you'll see the red lifting), then sprinkle with salt, sugar or powder, brush off and repeat. After each of these treatments, launder as usual in cold water. No bleach or fabric softener left? A cup of white vinegar added to the wash cycle can brighten and soften fabrics and neutralize food and perspiration odors.

spinner image A woman hand washing clothes in a basin
Mariakray/iStock/Getty Images Plus/Getty Images

10. Hand wash items you usually dry clean

Hand washing silk, linen, wools, cashmere and some synthetic blends labeled hand wash will take time since you need to air dry them, but if not now when? Do one item at a time, keeping whites, pales, brights and darks separate. Fill your sink with cold water and some mild detergent or shampoo and swish it around till sudsy. Dip a Q-tip in the water and do a colorfast test on a small, not too visible spot on the item. No dye transfers? You're OK. Let your item soak for 20 minutes. Drain, refill with cold water and dip till no more suds appear. Lay the item on a towel and roll it up to gently press out excess water (no squeezing or wringing!). Then unroll and move it to a dry towel and reshape. No hanging to dry, please. If you find holes in your sweaters, quarantine them in sealed plastic bags till you can wash them. Deep clean and vacuum (this removes larvae and eggs) your closet ASAP.

11. Clean your costume jewelry

Real jewelry gets attention, but fakes hardly ever do. Those beads, baubles and faux gold or silver pieces we stack, dangle and pile on for a dose of color and joy can get sticky, dull and grimy. Separate rings, bracelets, necklaces and earrings into groups. Use an old toothbrush or a Q-tip dipped in white vinegar or some sudsy water (a drop of shampoo or hand soap does it) and lightly go over each item before rinsing with another Q-tip dipped in cold water. Be sure to dab dry once more to prevent excess moisture from loosening stones, strings or links.

Discover AARP Members Only Access

Join AARP to Continue

Already a Member?