Javascript is not enabled.

Javascript must be enabled to use this site. Please enable Javascript in your browser and try again.

Skip to content
Content starts here
CLOSE ×
Search
Leaving AARP.org Website

You are now leaving AARP.org and going to a website that is not operated by AARP. A different privacy policy and terms of service will apply.

4 Ways to Make Your Own Smartphone Charging Station

Corral your devices in one place to top off batteries, keep track of wayward phones


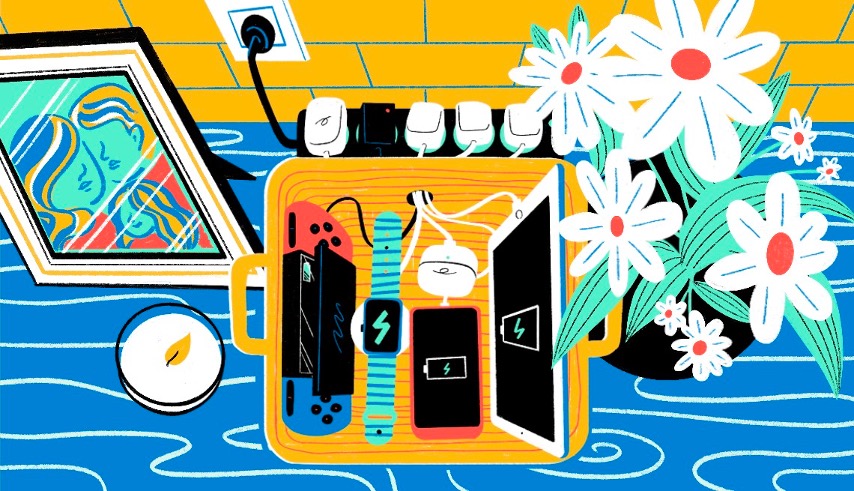
spinner image illustration of a charging station on a kitchen counter
Tare Jacoby

If the sight of charging cords all over your tables and countertops drives you mad, consider a do-it-yourself charging station to reduce the clutter. Bonus: Family and guests will have an ideal place to park their smartphones when dinner is served.

spinner image Image Alt Attribute

AARP Membership— $12 for your first year when you sign up for Automatic Renewal

Get instant access to members-only products and hundreds of discounts, a free second membership, and a subscription to AARP the Magazine.

Join Now

1. Use a basket to arrange the equipment

1. Cut a small hole in the back of a basket, decorative box or wooden tray with sides that measures at least 15 by 10 inches. A basket cover is optional. You’ll want the basket’s sides to be at least 4 inches high.

2. Apply hot glue around the edges of the hole to prevent the raw edges from fraying.

3. Place a charging dock or hub, which is a device with multiple chargers, or a power strip with the various chargers in the basket and thread the power cord through the hole.

4. Place the basket on a countertop and plug the dock or power strip into an outlet.

—Liz Rogers, home decor blogger @TheMrsRodgers

@lizmrodgers

DIY Charging Station 📲 Instructions below. With 5 phones and two iPads in the house, I couldn’t handle the cord madness anymore. Cords everywhere and everyone fighting over them. I found this cute basket and charging pad on Amazon, so I figured I could use the two together to clean this up. The charging pad comes with 6in cords of all different types, I ordered some additional 4in iPhone cords because we have so many apple devices that need to be charged simultaneously. And the ultimate bonus, everything stays HIDDEN! Comment LINKS for everything from this video sent to your DMs! Using scissors, I cut a hole in the bottom corner of the box to feed the main cord through to stay hidden. I used hot glue to seal the edges of the hole to prevent any fraying. Place charging pad inside, plug in the main cord, and you have your charging station! I used a clear drawer organizer to house extra cords and headphones. It also comes with a watch and AirPod attachment, so I kept that in the basket as well. #chargingstation #hiddencord #hiddenchatgingstation #hiddencharger #iphonestation #chargingbasket #diychargingstation #nomorecords #spring2023 #DIY #toddlermom #budgetfriendly #budgetfinds #lkn #Iknblogger #charlottenc #ncblogger #momhack #interiorstyling #interiordecorating #ltk #fy #fyp #fypシ

♬ original sound - Melat

2. Tuck power strips inside a cabinet

1. Drill a hole into the back or bottom of a cabinet that can be mounted on a wall, such as an over-the-toilet cabinet.

2. Mount the cabinet near an outlet in your kitchen or another room where everyone likes to charge their phones.

3. Place a charging dock or a power strip with various chargers in the cabinet and thread the power cord through the hole. Phones can sit on the shelves within the cabinet.

—Kelsey Pomeroy, social media coordinator and creator @KelseWhatElse

@kelsewhatelse

This is our DIY wall-mounted device charging station. We did not like having all of the charging cord clutter on our counters and it feels like everything needs charged nowadays, especially kid's toys. The diy device charging cabinet was our solution! We used an Anker charging block and did the watt math to make sure that we are not overloading it. We chose this charging block for its heat, voltage, and fire protection. We want simple solutions, not fires! So if you too make your own charging station, do your research and don't just choose any old charging block or extension cord. #momsoftiktok #homesolution #diy #chargingcabinet #midwestmom #momhack #parentinghack #declutter

♬ original sound - KelseWhatElse

3. Hide the charging station in a drawer

1. Purchase a recessed power strip. That’s the kind that sits flush with a surface where it’s mounted.

2. Trace the outline of the back side of the power strip onto the back of the drawer where you want the power strip to sit. Cut an opening following the outline so the power strip can drop into place but not go entirely through the opening.

3. Screw the power strip into the drawer. The cord should come out the back of the drawer.

4. Cut a hole into the back of the piece of furniture, if necessary, to run the cord to an outlet.

—Danielle Pientka, DIY blogger and woodworker at DIY Danielle​

4. Convert a bread box

1. Use your old bread box, a thrift store find or new purchase. Since most devices are thinner than a loaf of bread, you can install a shelf to double the capacity. These instructions are for a rolltop box.

2. Cut the shelf from lightweight board, often found in craft shops, to fit the inside of the bread box.

3. Drill four holes on the inside of the box at about the midpoint to attach support pegs for the shelf, making sure not to drill all the way through.

Technology & Wireless

Consumer Cellular

5% off monthly fees and 30% off accessories

See more Technology & Wireless offers >

4. Drill an additional hole through the back of the bread box that is large enough for the plug of a charging hub or power strip. You may want more holes for ventilation.

5. Put your pegs in the holes on the side of the box. Place the shelf on the pegs. Use a level to make sure the shelf is straight, and see if you need to notch out a spot or two at the rear of the shelf for cords from the devices charging on top to reach the hub.

6. Cover the shelf with wipeable contact paper, if desired, and attach your cords to the charging hub or power strip, arranging them so several devices can share space on the bottom and shelf.

—Jessica Bruno, home decor and multigenerational living blogger at Four Generations One Roof


Discover AARP Members Only Access

Join AARP to Continue

Already a Member?